Crochet lovers are always looking for new techniques that are both easy to learn and visually stunning. The block stitch is a fantastic choice, creating a wonderful combination of texture and structure. It’s perfect for blankets, scarves, and even home decor projects. Whether you are new to crochet or an experienced crafter, mastering the block stitch will add a unique touch to your creations.
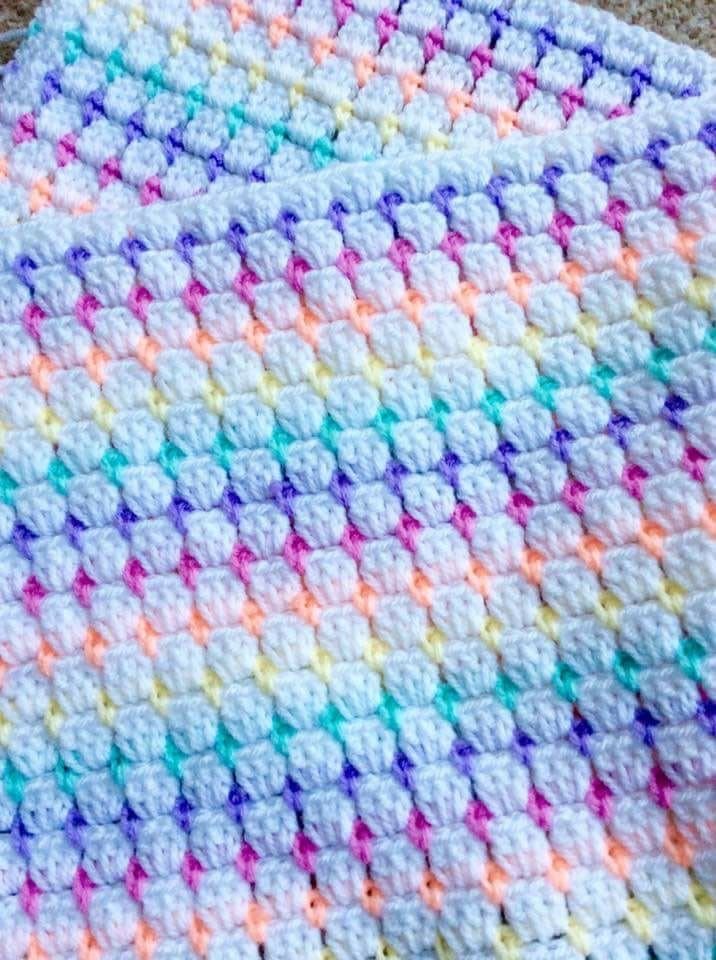
What makes the block stitch so appealing is its balance between openwork and solid sections. It offers a sturdy yet decorative look that can be enhanced with different color combinations. By simply alternating colors, you can create a modern, eye-catching design that looks far more complex than it actually is.
In this tutorial, we’ll walk you through the steps to crochet the block stitch, including how to incorporate a beautiful border. Follow along and get ready to add this stunning stitch to your crochet repertoire!
Materials You’ll Need
To begin your project, gather the following materials:
- Yarn: A worsted-weight yarn works best for a well-defined stitch pattern.
- Hook: Use a 5mm or 5.5mm crochet hook.
- Scissors
- Tapestry needle (for weaving in ends)
Abbreviations (US Terms)
- sc – single crochet
- st – stitch
- ch – chain
- dc – double crochet
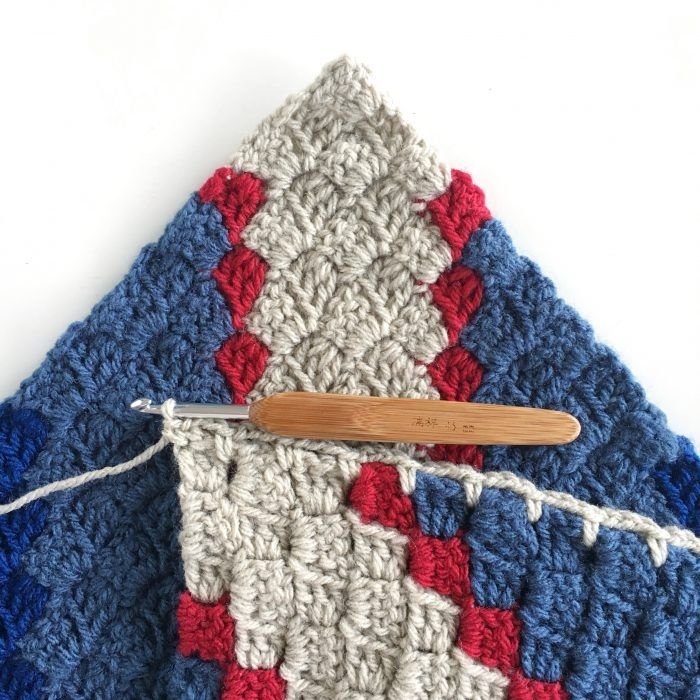
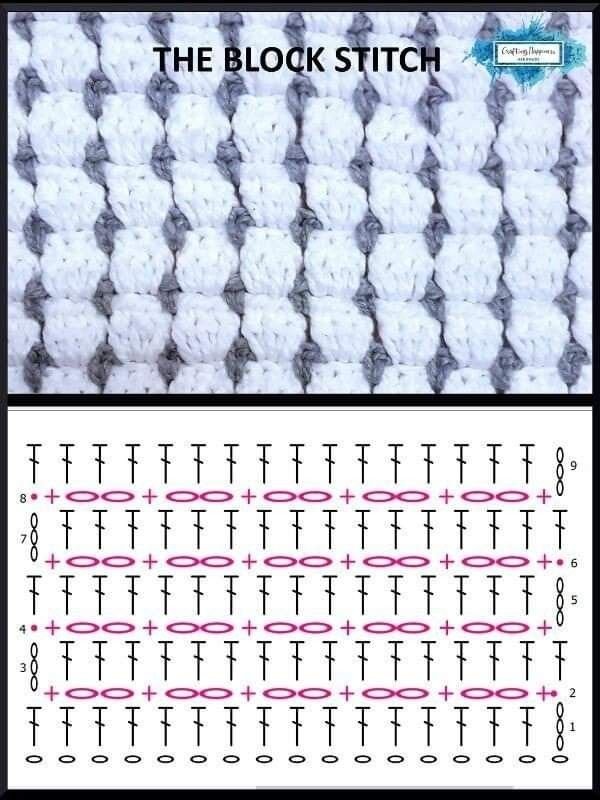
Block Stitch Pattern Instructions
Foundation Row:
Using White, chain 115 stitches.
Row 1:
- Sc in the second chain from the hook and in the next st.
- Ch 2, skip 2 chains, sc in the next ch across until one stitch remains.
- Sc in the last ch. Ch 1, turn. (37 ch-2 spaces made)
Row 2:
- Dc in the first stitch.
- Work 3 dc stitches into each ch-2 space across.
- Dc in the last stitch. Ch 1, turn. (37 clusters plus 2 dc on each end = 113 dc stitches total)
Note: When working into a ch-2 space, insert the hook under the space instead of into the chain stitches.
Row 3:
- Sc in the first stitch and in the space between the first dc and the first cluster.
- Ch 2, sk 3 dc, sc between clusters across the row.
- Sc between the last cluster and the final stitch.
- Sc in the last stitch. Ch 1, turn. (37 ch-2 spaces made)
Repeat Rows 2 and 3 for a total of 87 rows, following the stripe pattern below. You will end on a single crochet row.
Adding a Beautiful Border
Round 1:
- Using White, sc evenly around the entire blanket.
- Work sc, ch 2, sc in each corner.
- Sl st to the top of the first stitch to join. Ch 1.
Round 2:
- Hdc in each stitch around the blanket.
- Work hdc, ch 2, hdc in each ch-2 space (in the corners).
- Sl st to the top of the first stitch to join. Cut yarn and weave in ends.
Round 3:
- Join River Ripple yarn.
- Sc evenly around the entire blanket.
- Work 3 sc in each ch-2 space.
- Sl st to the top of the first stitch to join. Cut yarn and weave in ends.
Color Combinations to Try
The block stitch is particularly stunning when paired with a mix of colors. Here are some gorgeous combinations to try:
- Classic Elegance: Navy blue, white, and gray for a timeless look.
- Sunset Tones: Burnt orange, mustard yellow, and deep red for a warm, cozy effect.
- Soft Neutrals: Cream, beige, and taupe for a minimalistic, chic appearance.

Where to Use the Block Stitch
- Cozy Blankets: The stitch provides a warm, textured feel perfect for snuggling.
- Fashion Accessories: Make stylish scarves, cowls, and shawls with this eye-catching pattern.
- Home Decor: Great for throw pillows, placemats, or table runners.
- Baby Items: The block stitch works beautifully for baby blankets, bibs, and hats.

By following this tutorial, you’ll quickly learn how to crochet the block stitch and create stunning projects with ease. Experiment with different color combinations, play with textures, and most importantly enjoy the creative process!
🎥 Watch the tutorial! We have a step-by-step video guide to help you master the block stitch with ease. Check it out and follow along.
For more crochet inspiration and tutorials, stay tuned to Honey Crochet Patterns!